Showing posts with label learning. Show all posts

Wednesday, 25 January 2017

Knitting tips: Knitting with Linen

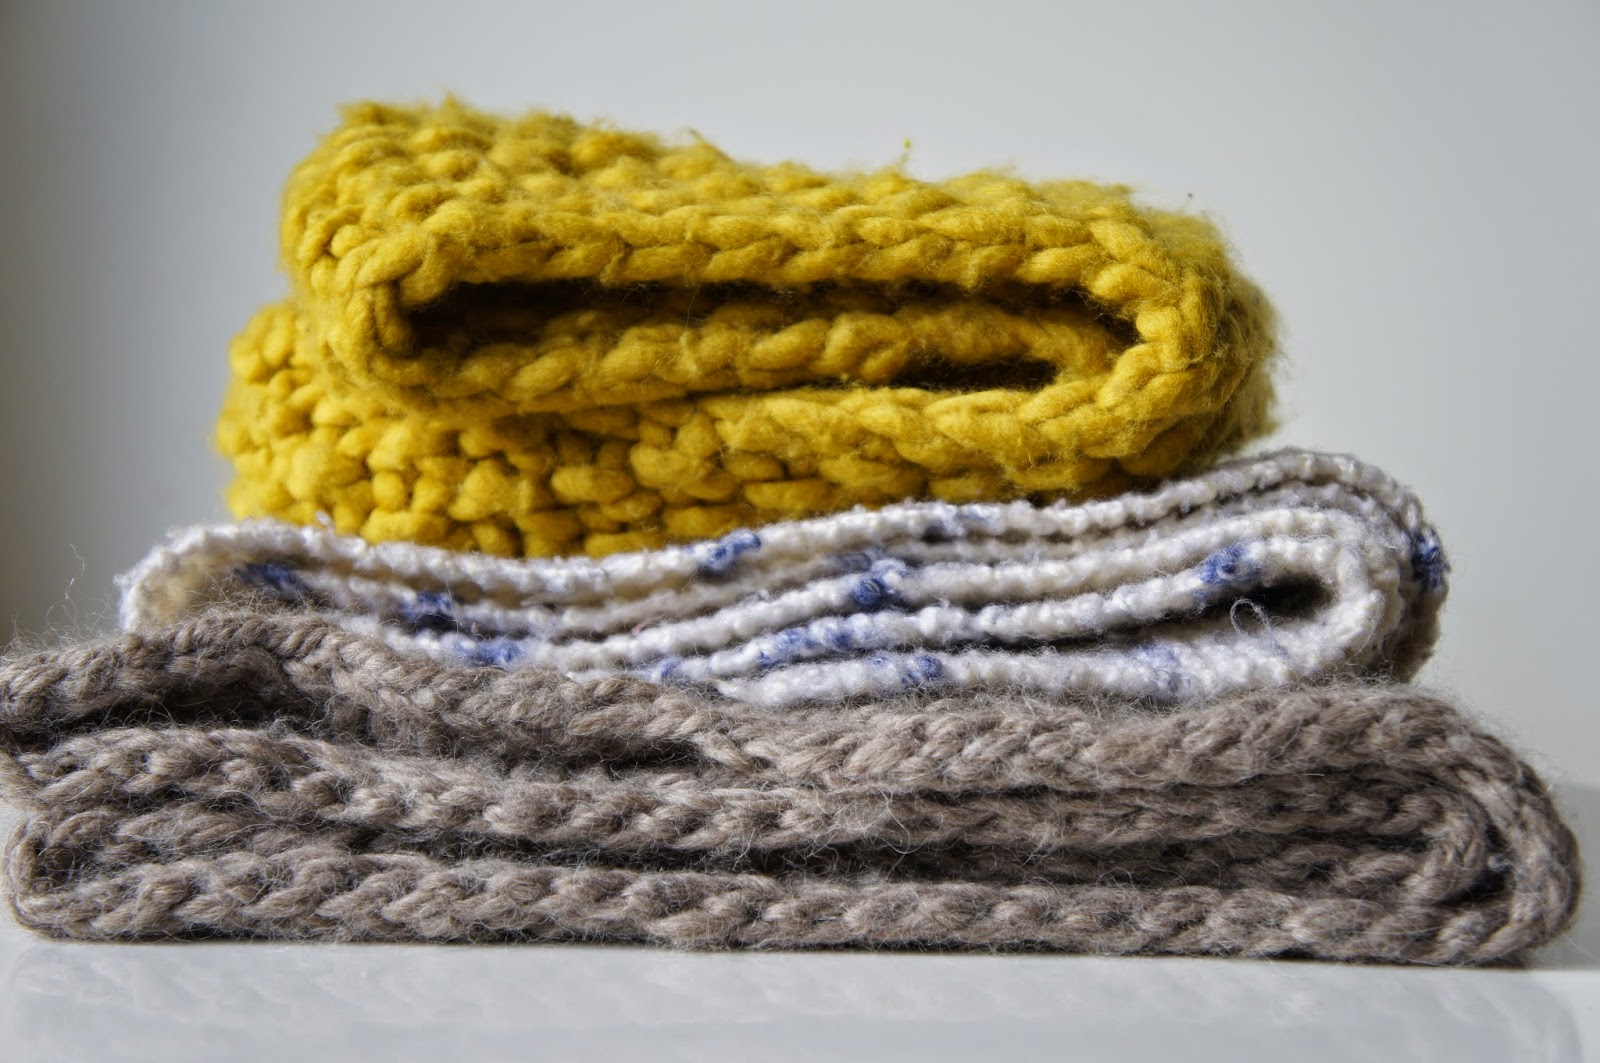
In an endeavour to have more knitwear to wear during the summer I knit two linen pieces this season. I went stash diving and found the sweater lot of Quince & Co. Sparrow that I had bought at least a year ago and I made Pam Allen's Perkin's Cove jumper. Then just last week I finished knitting a lovely cocoon of a shrug by Bristol Ivy called Bridie in Quince & Co's aran weight linen, Kestrel. Both of these garments are lovely to wear and they will definitely feature prominently in my summer wardrobe in the years to come.

I hear many people wonder what it is like to knit with linen yarn and I am by no means an expert, but here are some of my observations.

Linen is a plant fibre so it is smooth like cotton and it will not felt. However, because of the smoothness of the fibre it does also share the cotton's characteristic of having no bounce in the yarn. Unlike wool and many other animal fibres that have crimpy strands that will give the yarn bounce and memory, the plant fibres' smoothness will pretty much feel flat and "dead" in the hand. For some knitters, working with such fibres tend to cause their hands to hurt. After working two garments in linen I am ready to give my hands a rest from plant fibres and get back into some incredible woolly wools. 

In preparation for knitting with the linen yarn I was advised to hand wind the skeins. The lack of crimp in the yarn is just more suited to hand wound balls but that is not to say if you are short on time that you cannot knit from a cake that had been wound on a ball winder.


To try to avoid the stiffness in my hands I read Elizabeth Doherty's guest blog post on the Quince & Co. site. She suggests to ease up the tension and to go down a needle size or two so that you don't have to pull as tightly to achieve gauge. I did this with the Bridie project and tried hard consistently maintained a relaxed tension but I find the muscle memory in my hands often just take over when I get into a knitting rhythm and when I finished the pieces I had a little freak out moment when my knitting was much smaller than the suggested size pictured in Bristol's schematic. 

But here is how linen can shine. It is an incredibly strong fibre and can withstand some vigorous blocking. So I blocked the heck out of the Bridie and left it to dry over a weekend; I was not going to take it off the mats until it was bone dry. Because there is no crimp in the fibre once it is dry that shape is pretty much set until the next time it gets wet unlike wool which can I have noticed will gradually bounce back to it's preblocked state in some for or another. After blocking the Bridie cocoon, the size was much closer to the intended size and now it fits perfectly. I believe by blocking it the pattern has opened up a bit and it has resulted in a lovely drape to the garment.


When I was knitting the Perkin's Cove pattern with the Quince & Co. Sparrow yarn I found that my finished object was a bit wide and the stitches were looking a bit uneven and sloppy. So when I blocked that jumper I pulled it down to elongate the stitches and bring in the width. Stretching out the stitches lengthwise also helped to tidy up the elongated stitch pattern by evening it all out. Again I let it dry until it was bone dry and the linen has pretty much stayed in place.

Much of what I have read about linen knits emphasises how machine washing and tumble drying the yarn will soften it and give it more drape. I am yet to test this because I do not own a tumble dryer. I did however throw the Bridie shrug into the washing machine and that withstood the process. Linen, like cotton will not felt and is strong enough to take some rough treatment.

Both pieces have been such lovely layering garments for me to wear over the past month. I am so pleased with them both and next summer I will definitely have another linen knit on my needles. Maybe I'll play around with some Isager Bomulin next time.

Further Reading:
As mentioned above, Elizabeth Doherty's tips on the Quince & Co. blog are very help so do take a look. Another worthy read for knitting with linen is Hannah Fettig's post about finishing linen knits. Check it out here.

Links to my Ravelry project pages for my Bridie and Perkin's Cove.

Wednesday, 4 January 2017

Knitting tips: When you get stumped with a pattern instruction

Somehow I've ended up with the wrong stitch count at the shoulders on the front and I'm stuck.
We've all been there before and no matter how experienced a knitter we are we all experience the same rise of panic and frustration when we find a point in our project where we cannot proceed any further. 

You may have just realised that the pattern instructions and your actual knitting doesn't match up. You believe that you have followed EVERYTHING to the tee and you just don't know why this has happened. Or you had been happily chugging along with your knitting until you've reached a point in the pattern that is confusing or unfamiliar to you.

If you're like me, this usually happens late in the evening and I end up obsessing over it trying to work it out to fix the problem before I am able to go to bed. Which in reality probably doesn't help the situation at all and really a sleep and a fresh set of eyes is the possibly the most prudent approach.

Having experienced this panic and frustration many many times I have sat down and thought of a few suggestions for how to move forward.

1. I find all my patterns off Ravelry these days so that is often my first point of reference. I will look at the pattern page to see if the designer has posted any errata links or comments about tricky bits in the pattern. After that I look through the projects that other Ravelry users have made from the same pattern. This wonderful community is full of many generous and wise makers who diligently write up thoughts, modifications and problems they encountered. If there is an error in the pattern's instructions it would undoubtedly be picked up on by more than one knitter. The helpful ones will also provide details on how they moved forward from the problem or what they did to modify the pattern to their liking. I am eternally grateful for those benevolent knitters who freely share their wisdom and I do try to do likewise with my Ravelry project notes.

2. My current project, Annie Rowden's Polka Dot Tunic hasn't got many projects on Ravelry and so unfortunately there are no helpful notes from other makers. I am at a point where my knitting is not matching up to what the pattern instructions say. I am stumped but I am not at a loss. Many independent designers are willing to provide pattern support for their designs. They are dedicated to their fan base and will usually provide some kind of contact means for questions and feedback. In this case I have written an email to Annie and I hope to hear back in the near future. I'll let you know what happens...*

3. Sometimes you just need someone in real life to help you nut through a problem and a trip to the LYS is just what you need. At Sunspun we regularly have people popping in need of help with a project and we are all ways happy to take a look and spend a bit of one on one time nutting it out. We always try our best to send people off ready to keep knitting and on their way towards a beautiful finished project.

I hope you'll be able to knit problem free, so happy knitting.

UPDATE: My email to Annie has been replied and she has clarified everything. Turns out the pattern has errors and she will be updating the parts that I pointed out to her. I'm a bit chuffed to have made a contribution to this pattern and aided a designer. This is just another thing I love about the modern knitting community.

Monday, 29 August 2016

The Siren song of the Crafts

Lately the fabric has been calling to me and I've been daydreaming about sewing.
There are times when the craft supplies, whether they be the fabric stash or the yarns, call to you and pulls you in like a Siren song. This past couple of weeks I have been finding myself longingly staring at the fabric stash and dreaming of projects to turn those gorgeous pieces of cloth into. My skills are limited but my dreams are big.


The lure to craft is not unlike the effect of a Siren song upon a weary sailor. When the materials are special, the call is entrancing and irresistible like the mythical lullaby of the Sirens. When I feel the pull towards the fabric I find my brain is taken over by thoughts of projects and the colours and prints upon the cloth. It draws me in until I find myself working at my sewing station cutting and pressing and stitching away.

One of the Wiksten tanks that's I've made of late.

I feel like the pull to craft is not only something mystical it is some kind of subconscious push towards some tap out, therapeutic craft time. Like the weather-worn sailor I find myself in a season of busyness and stress and my ability to juggle everything is failing more often than I'd like. Mentally I'm feeling the strain and though I am tired and in a bit of a funk I cannot resist the urge to make something.

I've written before about how I find making and crafting very therapeutic; a path to mindfulness. Again I write here to reiterate it. Undeniably there are times when certain yarns or fabrics sing to you and you just know it is asking to be made into something beautiful. The process of making leads one to put aside the stresses and 'to do lists' of life for a while and the joy of a product made with love lifts the spirits.

A friend of mine was recently sharing of her struggle with depression and then excitedly took me down to her workshop where she has been making a table top with recycled wood. She spoke with such delight when she explained where each piece of wood originally came from and how she was almost finished with the varnish. Her work is beautiful and I marvel at her talent but more so her ability to find a positive mental space when she is feeling the blues.

More things cut out ready to sew up.

Sometimes we do not realise that we need to be involved in this process of making. Our heart and mind suddenly crave to make something and all stemming from a need to nourish the mind and soul with some positive energy. Initially, the pull may feel like a dangerous Siren song because of all those tasks that need to be ticked off and jobs to be done, but once we immerse ourselves into the making and take a breath we realise that craft time was exactly what we needed.

I believe it is alright to allow yourself a little bit of tap out time to do the thing that you love. The Siren song of Craft is not a bad thing, but instead a chance to experience a moment of mindful peace.

What do you like to make or do when you take the time to tap out from life's stresses? Does it nourish your mind and soul and feel like it was exactly what you needed to do? Share your thoughts.

Saturday, 23 April 2016

Mistakes are normal


This is a post that I have been planning in my head for quite a while now. For so long, I have wanted to write a post about making mistakes and rather than rushing in to half formed thoughts I have let myself take the time to ruminate over it for longer. I'm not saying that I have it all worked out yet either, but feel the need to break the blog silence and get some thoughts down before I forget them.

So, I feel like my creative journey has kind of exploded in the last couple of years. I really only re-found knitting when I was expecting my second and the bug bit me hard. Not only am I relishing in my making but I am hungry to learn more skills and develop into a better maker. As you can imagine mistakes are inevitable in this journey.

I find it funny how adults can be so hard on themselves when they make mistakes but we are always encouraging children to accept that mistakes are okay and that it is through out mistakes that we learn. I find that the hang up over mistakes can be rife in the crafting and making community too. When I receive compliments over something that I have made I am always quick to point out where I messed up and fudged something. 


Last year I attempted to make a Maeve shrug for myself and I had been so excited about the project. I think I even blogged about swatching for this project and how I really wanted to get it right. Well, I finished it and I didn't get it right. In fact I've had it in a bag since last September because I knew I had completely stuffed it up. 

I had thought I was being clever by knitting a nice selvedge stitch edge through the back section of the shrug when it wasn't called for in the pattern. When it came time for me to pick up stitches for the garter stitch collar I realised that I had made a big mistake and that my stitch count for the collar was terribly off. I knit the collar anyway with the number of stitches that I had and was in complete denial about my big stuff up. When I finished the shrug and tried it on the collar was much too tight and didn't have the drape that it was meant to have. It was so tight that at the back the piece didn't even sit flat, but kept rolling up. It was horrible and I was so disappointed with myself for not getting it right.


This week I pulled out the sad crumpled mess and decided that it was time to frog it. I have just started and have a long way to go but I am actually at peace over it. In the time since I finished the knit till now, I have been grappling with the idea of what I should do. Initially I thought maybe all I needed to do was frog the collar and reknit it with increases to get to the stitch count that matched the pattern. Then I thought I needed to reknit the whole thing because I know that my gauge has changed since I worked on that project and if I only redo half of it then the fit might be funny. I have also been tossing back and forth the idea that having a very brightly yellow shrug is a bit "full on" and maybe after all the hard work I won't even end up wearing it because of the colour.

My decision in the end is to frog the whole thing and to use the yarn for a pullover. One day I will come back to this pattern and I will knit it in a neutral colour because I still really want this shrug in my wardrobe and I know now that I should make it in a colour that will work with most of the stuff that I own.

Now that it's settled in my head I am beginning the task of ripping it apart. I had been so fearful of the task ahead of my and had been putting it off, but now that I am actually doing it I am excited again about the yarn and the potential new project that I could make with it. I had lost my love of the yarn because it was all wrapped up in this "failed" project and really, that is such a shame.

The journey that this particular project and the mistakes that I have made have grown me as a maker. I have learnt that I should think and plan better if I want to deviate from a pattern and I have learnt that frogging something is not a totally tragic thing to do because only then will the yarn be freed up to become something else.

Mistakes are a normal part of the making process. We should not let ourselves remain stuck over a mistake. There is always a way forward and sometimes that can still result in a fabulous finished object but sometimes what progress we have made may need to be undone and the whole thing started again. And, when that happens we can be hopeful that the next time round it will be an improvement from the last.

What are your thoughts? How do you deal with mistakes in your making?

Thursday, 17 December 2015

Blocking, what is it and why do we do it?

Pinning the lace yoke of my newly finished Sibella pullover will open up the lace a little more.


Mats and strong pins are the basic blocking essentials.
Blocking is another one of those things that knitters talk about and nobody else knows what it is. It is also one of those things like gauge swatching that often get skipped and you can be a knitter for many many years and not actually know what blocking (or swatching) is.

Basically blocking is what you do when you wet a piece of knitting and then you lay it out to dry. Sometimes the piece of knitting will require a bit of shaping and pinning in order to pull it into the shape and size that the pattern has indicated that it should be. 

There is a saying that "blocking fixes all problems", while this is not entirely true it does fix some things. One of the benefits of blocking is that by gently manipulating the wet knitting you can even out any tension discrepancies and help the stitches look more consistent. It is also essential with lace work to block the piece afterwards in order to open up the lace so that it will show properly.

Some yarns will not show it's full nature until it has been wet blocked. Some fibres will bloom after they have been wet and that simply means that the yarn will kind of puff a bit after it has dried from being wet. This blooming can affect the gauge of the knitted work and also the crispness of the pattern design particularly when colour is involved.

There are many different blocking techniques and each piece will require a slightly different treatment. However, here is a description of my standard blocking process. I will fill a bucket with water and put a little bit of wool washing detergent in it. I will let the knitting soak for at least 30 minutes to allow all the fibre to properly absorb the water and be saturated. After soaking I will gently squeeze the water out of the knitting; never treat handknits roughly for the risk of felting. Then I will roll the knitting up in a towel to remove excess water.

Lace blocking wires are especially useful when trying to achieve a straight edge on your knitting.
T Pins and wires.
Then I will pin the piece out on a foam mat; either a camping mat or a yoga mat. Sometimes I will also use lace blocking wires to obtain a really straight edge or to pull the lace open with a consistent tension. The pins I use are strudy 'T' shaped craft pins and the lace blocking wires are a set that I bought from my LYS, Sunspun.

I will leave the wet knitting pinned out to dry in a warm spot in the house or outside in a shaded spot. I make sure that the knitting is bone dry before I will remove the pins and wires otherwise the knitting will not maintain the shape or size that you pinned it out to. However, even this does not mean that the sizing and shaping is permanent. I have noticed in particular that no matter how meticulously I blocked my shawls that gradually they kind of scrunch up again. In fact, everything will need to be re-blocked each time it is washed, so I guess when those shawls are scrunching up it is just time for a quick wash and reblock.

I hope that gives you all a basic understanding of what blocking involves and why we do it. Now you can keep me accountable and avoid lazy knitter behaviours by asking me if I've blocked my finished projects before wearing them adoringly.

Wednesday, 22 July 2015

My humble thoughts on superwash wool

My sheepy friends from Bendi

Our lives are privileged enough to be able to enjoy the modern conveniences of washing machines and dryers and it only makes sense that we want our clothing to actually be washed in those machines. Maybe it is wool and other luxury fibres such as silk and cashmere's reputation for being high maintenance that makes people shirk away from buying and wearing everyday garments made of these fibres. Maybe an industry response to this was to make wool more convenient and hence developing a process that will allow it to be washed in a machine and not come out as a shrunken felted mess. Or maybe scientists just need to show how clever they are and they worked out how to "superwash" wool and everyone thinks it's the best thing since sliced bread. Well, I respect that those scientist are very clever but now that I know what is actually done to the woollen fibres to make it machine washable I am reconsidering my interest in superwash wool.

I'm not an expert but my basic understanding is that fibre, especially animal fibre is actually made up of lots of scales when you look at it on a microscopic level. When this fibre is agitated rigorously like it is in a washing machine the scales will get all jumbled up and and will mat together and become felt. That's all fine and dandy when you actually want to felt and object but if that's not what you want then you're bound to face the chore of handwashing woollens at some stage of your fibre loving life.

Now again, basic understanding here but when wool is turned into superwash wool it goes through the very unnatural process of being washed with chlorine to strip the fibres of the scales and then the fibre is coated with a plastic polymer so that the fibre is kept 'smooth' and it will not be able to felt when machine washed. 

There are some noticeable pros with superwash wool such as it absorbs dye better and hence it has become a bit of a favourite fibre among the hand dyeing community. I have also mentioned in a past post that I noticed that the superwash garments that I have knit for my kids have pilled less and that I was actually going to use superwash for their clothes in the future - but that claim was made before I learnt about the superwash process. I am not a super conscious eco person so I will not be purging all superwash from my stash never to touch it again. My only aim is to avoid it if I have other options and to challenge myself to discover more yarns that have been exposed to less processing.

I think it was sometime last year that the Swans Island Company released a Ecowash line of yarns to their range. They explain that they use a natural process to turn their organic merino wool into a machine washable yarn. Their technique uses and organic enzyme that will render the yarn washable and prevent it from felting. I am really interested in trying this yarn and hope to make my child garments from this in the future.

There are many reasons why I love wool and one of them is because it is a natural fibre and now that I know a bit about the superwash process I kind of wonder why would we submit this beautiful fibre to such and unnatural process. I handwash all my knits regardless of what type of wool I used to make it with so I don't actually have a good reason to use superwash wool. It is my own personal aim to avoid superwash and I am not trying to be an advocate for anti-superwash sentiment but I thought it was worthwhile explaining myself.

Ashley Yousling's Woolful blog has also got an interesting post about superwashing fibre and she is much more informed that I am on the topic. Check it out here if you want to read more. Also, Ashley's latest podcast episode (29) features Jackie Ottino-Graf from the Swans Island Company and she explains a little about their Ecowash line and discusses it's good points. I really enjoyed listening to the episode and I have a renewed interest in trying their yarn for a knit that I plan to do for Sir S.

I hope I'm not stepping on any toes and offending anyone in the fibre community. This is really just my humble opinion and I respect all who are involved in this industry that enables me to knit with a wonderful fibre.

Tuesday, 14 July 2015

Finished object file: Crag hat | Debbie Bliss Cashmerino Aran


School is back and I'm going to aim to get back into the swing of things. I must confess that I do find the balance between blogging about knitting and actually knitting hard. When on the kinder days I only get a couple of hours completely kid free during Miss L's nap I often choose to knit rather than blog because I have so much knitting I want to get through. However, since I keep starting new projects I don't think that status is going to change any time soon, so today I'm going to keep the needles aside and update the blogosphere about one of my latest finished objects.

After asking my friends and readers to help me choose between the Bartek and Crag hat patterns to make for my husband as an anniversary present (you can read about that here) I went with popular opinion and knit the Crag.

I wanted to use up the charcoal Debbie Bliss Cashmerino from my stash but after making two swatches with the aran (heavy 10ply) weight yarn I was starting to lack confidence in my choice. Using 4mm needles for the main pattern was still slightly off gauge but I didn't want to go any smaller because my hands were finding it uncomfortable knitting such heavy yarn on small needles. I kind of fudged it because I rationalised that if I kept my tension tighter for the actual knit and because the Hubs does have a bit of a big head I think I can get away with it in the end.

For the actual knit I started on 3.25mm needles for the ribbing and used a crochet cast on that my dear friend Jenny (Tatterz on Ravelry) taught me. I was leaving this present to the last minute so I decided to skip the tubular cast on because I just wanted to get onto it rather than fiddle with a third needle size and learning a new technique. 

Once I got going into the main body of the hat it was pretty easy to memorise the pattern and it would have been a really enjoyable knit if it didn't hurt my hands. I found I could only do about one set of the pattern repeat before I needed to rest my hands. 


In the end I didn't finish it in time for our anniversary but I did have it done for our time away in Marysville. The Hubs wore it when we went up Lake Mountain to take the kids tobogganing and he said it was perfectly snug and at times he had to take it off because it made him too hot. All credit for that goes to the beautiful cashmere and merino blend of the yarn. You can't go past good fibre when you want warmth.


My latest lesson that I have learnt after knitting this Brooklyn Tweed design and also the Rosebud hat is that I should substitute with either a light worsted or even a DK weight yarn rather than use aran. I have never used Brooklyn Tweed's Shelter yarn for which both these hats were designed for and I hope one day to get the chance to use it but for the time being I am definitely going to select more carefully when substituting for future BT projects.

Wednesday, 8 April 2015

How I got converted to being a gauge swatch knitter

My original swatch for the Maeve pattern.
We're still battling illness (I know whinge whinge...it's unending) so I'm skipping 'What to knit Wednesday' again, but I don't want to give up on this blog so I'm writing about some of my current thoughts on gauge instead.

For the uninitiated a gauge swatch or tension square is what knitters are meant to knit before beginning a project. The swatch is a way for the knitter to test that their knitting tension will match the suggested tension or gauge of the pattern. Every pattern will list how many stitches and rows will make up a certain area of knitted fabric. Sometimes patterns give a 1" gauge, sometimes they list 4" and for metric it'll be 10 cm of fabric. If gauge is followed accurately the end project will theoretically be the exact size measurements that the pattern designed it to be and that is the main reason people say it is important to check gauge when knitting.

I generally have been a naughty knitter/ lazy knitter and avoided knitting gauge swatches in the past. I restarted my knitting life knitting a blanket for my baby girl and then clothes for the kids. I personally didn't feel too concerned by what size these items ended up being as long as they were generous enough to get a good amount of wear by the growing little bods. Whenever I buy kids clothes I always go big because my motto is, "kids grow." I didn't even measure the kids before I knit and just went by the suggested age size; which is really bad of me because my kids have very slight builds for their ages. 

Other reasons I avoided swatching was because I usually tried to knit with the yarns that the pattern suggested. This sometimes ended up with me sourcing yarns from the US and paying the hefty international postage rates. When I didn't knit with the suggested yarn I would still stick to the same yarn weight and just hoped that it would come out the same. I would also check up on Ravelry other knitters who had substituted with the same yarn I was using and just work off their suggestions and modifications, so if they went down a needle size I followed suit. 

For my recent personal items I also chose not to swatch because I knit things where gauge wasn't really that important. When knitting a shawl, having a different gauge doesn't impact the fit of the garment because it's just something to drape over the shoulders. Even my recently finished Moto Vest didn't really have strict gauge requirements because it was a drapey open vest design.

In my mind checking gauge was only something important if I was making something that I needed to fit in a particular way and since I didn't really do projects like that I was going to keep skipping that step.

Here are my pins mark out the 4" square.
However, in my last post I mentioned that I was allowing myself a little 'hit' of the gorgeous The Fibre Company's Canopy Worsted yarn by knitting a gauge swatch for the Maeve shrug. I love handling the yarn while I was knitting my little square of stockinette but when I took out the ruler to check my gauge I was off and even after blocking the square I was still off. What I got was 19 sts and 27 rows = 4" rather than the 18 sts and 26 rows that the pattern listed. What this means is now I need to knit a new gauge swatch with larger needles and then block it and check gauge again, before I can allow myself to get started on this project.

So, why the change of heart on gauge swatching?

1) I really love this pattern and yarn and I want to make it perfectly. To do justice to this pattern and the yarn I really need to respect it and treat it properly.

2) Knitting the little swatch gave me a little taster of this soft yarn and I couldn't resist going to it and patting it while I had laid it out to block. I recently listened to the Clara Parkes (The Yarn Whisperer) interview on the Pom Pom Magazine podcast and she mentioned that she has a little swatch of some of her favourite yarn that she carries around in her handbag and she will touch it every now and then when she's grabbing stuff out of her bag. I can see myself doing that with this yarn; I just love it so much.* 

3) I also recently listened to an old knit.fm podcast episode where Pam Allen and Hannah Fettig discussed gauge**. They carefully explained why knitting gauge swatches cannot be skimped on and I learned some really interesting things from them. I learnt that every knitter's gauge is different and that gauge is affected not only by the knitter's style and tension but also the needles you knit with and the most obvious one, the yarn being used. Pam even stressed that the same yarns but of a different batch could still yield a different gauge to one another. Now that really surprised me and has given me a much deeper understanding of the complexities of gauge.

Cast on for another 6" square
I'm off to knit another swatch for the Maeve Shrug on 5mm needles. What are your thoughts on gauge? Have you struggled with getting the gauge right on your projects? What tips do you have for swatching and preparing to knit a cherished pattern?

*Ok, I'm totally disregarding the fact that I am starting to sound like a crazy yarn lady.

**This podcast episode is well worth listening to: http://knit.fm/blog/2013/10/2/episode-one-gauge

Sunday, 1 March 2015

Craftworks

My little basket of goodies for craftworks today
This afternoon I had the privilege to craft with some very talented and lovely ladies from church. Though our family has been at St Mark's Camberwell for a year now this was the first time that I made it along to the craft group that is quaintly named 'Craftworks'.

Not only was it my first time at the group but it was also my first time crafting in a social group. I mostly do my knitting at home on my own after the kids are asleep and I often find this quite lonely. Not many of my close friends knit or sew and those who do aren't obsessive about it like I am. Hence, it was so refreshing to be at a craft group today.

I also found it such a pleasure to be able to spend some time with this group of ladies who I don't normally get the chance to interact with at church. Being a young mum I generally spend time speaking to the other parents but today was such a blessing. I am excited to get to know these ladies more and to learn not only more about crafting from them but also gaining life wisdom too. These ladies are mothers and grandmothers and they have all had an interesting life and faith journey and I truly believe it is a privilege to journey alongside them while we craft.

Do you attend a craft group? How did you discover it? What do you enjoy most about your group?

Wednesday, 25 February 2015

What to knit Wednesday: patterns for beginners


Today I'm going to be starting a regular feature called, "What to knit Wednesdays." So, the idea is that each week I'll write a post to review 5 patterns that I have either knit or I want to knit. This will be a great opportunity for me to showcase some of the lovely patterns that I have had the pleasure of knitting.

Yesterday at playgroup I had the privilege to teach another mum how to knit. We only got so far as casting on and knit stitch but this got me thinking about what patterns are perfect for beginners.

1. The most simple thing to start with is a garter stitch scarf. I'm sure that most knitters have been there at some point while they were first learning. My mum taught me to knit when I was 9 years old and my very first finished object was a garter stitch scarf that still has a much loved place in my wardrobe.

I'm never letting go of my first ever finished knitted project. This is good nostalgia.
Garter stitch is simply knit every stitch for every row, so there really isn't a pattern written up for this because it is so simple.

2. When you've mastered the knit and purl stitch you can move beyond knitting garter stitch patterns to something a little more interesting. I like moss stitch patterns where the knit and purl stitches are alternated and then for the next row the purl stitch is placed above the knit stitch and the knit stitch is placed above the purl stitch.

Row 1: K1, P1
Row 2: P1, K1

3. Progressing from moss stitch knit flat, try knitting a moss stitch cowl. Taking the next step and learning to knit in the round is not really daunting at all. Circular knitting is actually a fantastic thing to master if you hate seaming. 

Jane Richmond's Marian cowl is a great example of a seamless moss stitch cowl. I love it because it is knit with super bulky yarn on big needles and you can knit until you run out of yarn - no left overs.

The Marian cowl is perfect to begin trying circular knitting with.
4. The first hat I ever knit was the Simple Baby Hat pattern designed by the team behind the fabulous Norwegian Pickles blog. This particular pattern appears in Jenny Lord's "Purls of Wisdom" book and it's a perfect little hat for tiny babies. The Pickles blog is full of amazing knitting patterns, all imbued with classic Scandinavian style. Take some time to check it out if you're looking for a new pattern to work on.

5. Another oh so simple cowl that I have knit twice is Lara's cowl. The pattern is seamlessly knit in the round with super bulky yarn and only requires knit and purl stitches to create a checkerboard look.

This pattern was so easy I knit an extra one for gifting.
So here we are, 5 patterns that are perfect for beginners. Which patterns were your first knits? What would you suggest to beginner knitters?

What other patterns would you like me to feature in this series? Kids knits? Baby items? Softies? Leave a comment with your requests.

Sunday, 8 February 2015

Why yarn is not just wool.

When I speak to people about knitting I come across some common misconceptions about the craft and today's the post may be the start of a series that will explain some of the basic elements of knitting and crocheting.

To start with you may have noticed that I always speak about "yarn" rather than use the term "wool" to describe the material that I work with. The simple explanation for this is that wool only comes from sheep and it is only one of the kinds of fibre that a crafter can work with. Basically, anything that can be made into a fibre can be used to produce yarn for knitting and other crafts. Other types of common animal fibres that are spun to make yarn are alpaca fur, angora from rabbits and mohair and cashmere from goats. Beyond those more commonly known fibres there has also been a growing interest in spinning yarn from  animals such as camels, possums, llamas and even bison.

Debbie Bliss Como is a super bulky Merino Cashmere blend
Also, let's not narrow our thinking to just animal fibres. Yarns have also been made with plant fibres such as cotton, linen, hemp and bamboo. Silk is also a common component in yarns but as it is a protein based fibre that is excreted by the silkworm after consuming mulberry leaves doesn't quite fall into being an animal fibre nor a plant fibre.

Scientific advancements during the early 20th century also produced a number of synthetic fibres. Acrylic, Rayon, Microfiber and Nylon can be cheaper, more durable and often machine washable. When I was little and forced to wear an itchy jumper that my mum had knit with acrylic yarn I hated anything "woolen". To be honest I would still hate to wear anything that is knit with balls of 100% synthetic yarn, but, synthetics do have their merits. Because of it's durability a small percentage of it is often spun together with lusher fibres to give the yarn strength. If you're knitting socks it is common to find a sock yarn what has a small percentage of nylon to make those hard wearing items more durable. So, don't fear a yarn that has a little bit of synthetic in it, it can still be comfortable to wear against the skin if the bulk of the yarn is made of something else.

Shibui Sock yarn in Peony colourway
So, you might ask what is the softest yarn out there? Well, there is no easy answer to that. Other than personal preference making it an extremely subjective topic, there is also the complicated matter of how the fibre is produced or grown, how it is harvested or shorn, how it is processed into a fibre and how it is spun together. Even which animal it comes from plays a factor. For example, the fur of a lamb or baby alpaca is beautifully softer than older animals of their species.

Cephalopod Merino DK in Gallifrey colourway
What I like working with the most is merino wool. This wool is buttery soft, dyes up beautifully and though not cheap, it is worth it's price tag because it is easy to knit with and comfortable to wear against the skin.

Carefully reading yarn labels is an important thing when choosing yarns. I also highly recommend taking a close look at clothing labels before buying a mass produced knitted garment. 

If you want to understand yarn fibres a lot more a good book to read is 'The knitter's book of yarn' by Clara Parkes. I had it out from Camberwell Library over Christmas and learnt a lot about fibre from it.

Do you have a favourite yarn to work with? Do you stay away from wool because it itches? What experiences have you had with "woolen" garments? 

Tuesday, 27 January 2015

"Uh oh, now she's sewing too..."


Yep, that's right I've picked up sewing and finished my first project.

While recently researching on The Purl Bee blog for a cute baby knitting pattern I came across this super cute bonnet, but I had one problem, I'm a knitter not a sew-er. However, I just couldn't resist because I just love bonnets - I think it's the Jane Austen-ness about bonnets that draws me to them. 

To solve my problem of being only a novice on the sewing machine I did a call out on FB for some help and very kindly one of my friends stepped up. I would not have succeeded in making this bonnet without her invaluable help. Being part of my church community has blessed me with the opportunity to learn from the many experienced crafters in our midst. I have plans to join the craft group this year with hopes that I can learn more as well as get to know some of the lovely ladies at church better.

I felt so lucky when I found this piece of Liberty of London fabric in the remnants box at Tessuti. I've got enough of the remnant left over for a couple more bonnets, so that's definitely a great score.


This first time project is a little rough around the edges. I struggled to sew the seams straight particularly on the bias strips and the finishing hand sewn seam is very rudimentary but I still love how it has come together. 

When I finally convinced Miss L to put it on for me to take some photos I squealed with delight at the cuteness overload. The bonnet fits perfectly and she looks so cute with it on - though of course I may be biased.

Now that I've conquered my first sewing project I look forward to making more clothing for my kids in the future. Although I think the husband will truly soon be saying, "Uh Oh, now she's sewing too.", as he sees our home slowly being taken over by my crafting.

If you have suggestions for other easy to make sewing projects feel free to link to their patterns in a comment.